MATRIX
Setting OTA:
Kirim SMS ke888 dengan pesan :
ACT[spasi]GPRS
MENTARI
Setting OTA via SMS ;
Kirim SMS ke3000 dengan pesan :
Ketik : GPRS[spasi] merk HP[spasi] tipe HP
Setting Manual :
GPRS
Profile Name : INDOSATGPRS
Homepage URL : http://wap.klub-mentari.com
IP Address : 10.19.19.19
Bearer : GPRS
User Name : indosat
Password : indosat
APN : indosatgprs
MMS
Profile Name : INDOSATGPRS
Homepage URL : http://mmsc.indosat.com
IP Address : 10.19.19.19:8080
Bearer : GPRS
User Name : indosat
Password : indosat
APN : indosatmms
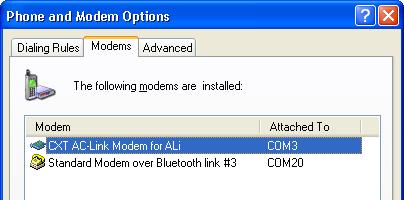
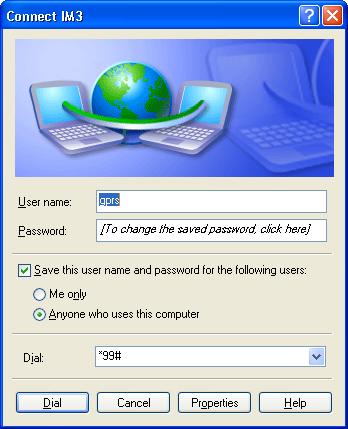
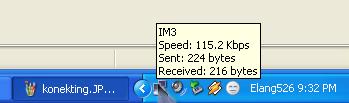
IM3
Setting OTA via SMS ;
Kirim SMS ke3939 dengan pesan :
Ketik : GPRS[spasi] merk HP[spasi] tipe HP
Setting Manual :
GPRS
Connection name : M3-GPRS
Access point name : www.indosat-m3.net
User name : gprs
Password : im3
Authentication : Normal
Homepage : http://wap.indosat-m3.net
IP address : 010.019.019.019
Port : 9201 (standard), 8080 (proxy)
MMS
Connection name : M3-MMS
Access point name : indosatmms
User name : indosatmms
Password : indosatmms
Authentication : Normal
Homepage : http://mmsc.indosat-m3.net
IP address : 010.019.019.019
Port : 9201 (standard), 8080 (proxy)
TELKOMSEL
KARTU HALLO
Kirim SMS ke 6616 dengan pesan :
Ketik : GPRS
KARTU SIMPATI/KARTU AS
Kirim SMS ke 6616 dengan pesan :
Ketik : GPRS[spasi]angka dibelakang simcard Anda (Nomor ICCID/Integrated Circuit Card Identification)
Kemudian tunggu beberapa saat, Anda akan mendapat SMS konfirmasi bahwa aplikasi GPRS sedang diproses. Waktu yang dibutuhkan sekitar 48 jam. Setelah GPRS aktif, Anda akan mendapat notifikasi SMS lagi yang menyatakan GPRS sudah aktif.
Setting Manual :
GPRS
Profile Name : TSEL GPRS
APN : Telkomsel
User name : wap
Password : wap123
Authentication : Normal
Gateway IP address : 10.1.89.130
Homepage : http://wap.telkomsel.com
Data Bearer : GPRS
Proxy port number : 9201 atau 8000
MMS
Connection Name: tel-MMS
Data Bearer: GPRS
Access Point Name: mms
Username: wap
Prompt Password: No
Password: wap123
Authentication: Normal
Proxy address: 10.1.89.150
Homepage: http://mms.telkomsel.com/
Connection Security: Off
XL
Setting OTA via SMS ;
Ketik SMS dengan isi : GPRS[spasi][spasi] Kirim ke 9667
Ketik SMS dengan isi : MMS[spasi][spasi] Kirin ke 9667
Setting Manual :
GPRS
Connection Name: XL-GPRS
Data Bearer: GPRS
Access Point Name: www.xlgprs.net
Username: xlgprs
Prompt Password: No
Password: proxl
Authentication: Normal
Homepage: http://wap.lifeinhand.com
Connection Security: Off
Session Mode: Permanent
IP Address: Automatic
Proxy Server Address: 202.152.240.050
Proxy Port Number: 8080
MMS
Connection Name: XL-MMS
Data Bearer: GPRS
Access Point Name: www.xlmms.net
Username: xlgprs
Prompt Password: No
Password: proxl
Authentication: Normal
Homepage: http://mmc.xl.net.id/servlets/mms
Connection Security: Off
Session Mode: Permanent
IP Address: Automatic
Proxy Server Address: 202.152.240.050
Proxy Port Number: 8080
3 (THREE)
Setting Manual :
GPRS
Settings’ Name: 3-GPRS
Homepage : http://wap.three.co.id/
Proxies : Enable
Proxy address : 10.4.0.10
Port : 3128
GPRS access point : 3gprs
Authentication type : Normal
Login type : Automatic
Username : 3gprs
Password : 3gprs
MMS
Settings’ name : 3-MMS
Homepage : http://mms.hutch.co.id/
GPRS access point : 3mms
Authentication type : Normal
Username : 3mms
Password : 3mms
Allow adverts : No
KARTU AXIS
Parameter Umum GPRS
Connection Name : AXIS
Data Bearer : GPRS atau PS
Access Point Name (APN) : AXIS
Username : AXIS
Prompt Password : No
Password : 123456
Authentication : Normal
Gateway/Proxy IP Address : 10.8.3.8
Gateway/Proxy Port : 9201 atau 8080
Homepage : http://wap.axisworld.co.id
Connection Security : Off
Session Mode : Permanent
Parameter Umum MMS
Connection Name : AXISmms
Data Bearer : GPRS atau PS
Access Point Name (APN) : AXISmms
Username : AXIS
Prompt Password : No
Password : 123456
Authentication : Normal
Gateway/Proxy IP Address : 10.8.3.8
Gateway/Proxy Port : 9201 atau 8080
Homepage / MMS Server : http://mmsc.AXIS
Connection Security : Off
Session Mode : Permanent
Sumber : selular.co.id